
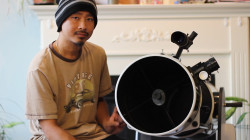
In this video, I demonstrate how I collimate my newtonian telescope without a cheshire (if you don’t have one). There are 3 basic steps to collimating: 1) Center the secondary under the focuser; 2) Align the secondary to the primary; 3) Align the primary back to the secondary. In step one, I will use a camera phone instead of a cheshire to center the secondary under the focuser tube. Click on the video below to play.
Tag Archives: dobsonian
First Light with 12″ Sky-Watcher Flextube

I took my 12″ Sky-Watcher Flextube to the Durham Region Astronomical Association’s dark site last night for the first time and found that the location was a few minutes further and more difficult to get to than Long Sault Conservation.
Moon: With a 75% full moon, it lit up the haze so much that I could not even resolve M31. So I put my shades on and observed the moon instead. The details of the moon’s surface at the terminator was spectacular. With a barlowed 7mm (428x), the image was wavering quite a bit, but so incredible. I could resolve the craters and the shadows they cast. It was like hovering over the moon in a spaceship.
Jupiter: I packed up and went to friend’s house to watch a boxing match. By the time it was over, it was already 2 AM and I could see Jupiter already. So I setup my telescope right at my front steps to observe it. At 214x, I could resolve the 2 dark stripes and at least 4 moons but again, it was wavering and not focused. At 428x, it was even worse. I was a little disappointed because the view was only marginally better than my Discovery 8 EQ.
M42 Orion Nebula: By 3 AM, I noticed Orion’s belt was higher and was above a line of haze. Still struggling with my right-angle viewfinder orientation, I pointed it in the general direction of M42 and started panning the area at 62x. It took 30 minutes and I was about ready to give up, until I noticed a glare from the corner of the FOV. I followed the glare as it got more intense, and then it emerged: The Orion Nebula.
I couldn’t believe it that even with all that haze, it was resolving with very good contrast. I noticed at least 2 round voids occupied by stars in the white dust that radiated away from the centre in 180 degree direction. I was so happy that I even woke up my wife to show it to her. Her reaction after seeing it was interesting to me: “you mean that cloud?”

Concerns: Significantly heavier and more awkward to transport than the Discovery 8 EQ. Altitude adjustment was sticky and tube is bottom-heavy it wants to slew up quite often by itself. No significant proof of improvement over the Discovery 8 EQ thus far.
At 4 AM I packed it in. What a great ending for a mostly disappointing night.
DIY Custom Shroud for 12″ Sky-Watcher Flextube
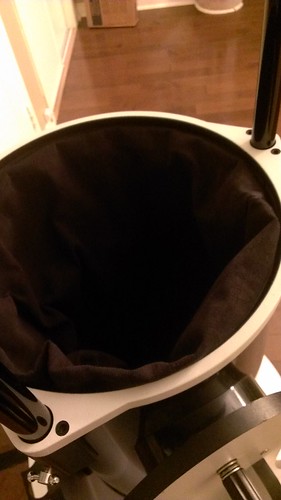
Rainy days and cloudy nights make me so restless. Tonight was another one of those nights. All day, I had been thinking about custom cutting a foam sleeping mat as a shroud for my Sky-Watcher 12″ Dobsonian Flextube. But on the way home, I came up with something a little more complicated and time-consuming. A custom-made cloth shroud.

Step 1: I measured the inside diameter of the top and bottom tubes and the distance between them. I came up with 42.5″ diameter x 23″ height. I went to the local Fabricland and bought a thick black cloth from the clearance section ($7).

Step 2: I measured again and noticed that I had to reduce the inside diameter by half an inch to account for the thickness of the cloth. The maximum thickness allowance is 0.5″, otherwise, the material will reduce the aperture. I folded and ironed the new measurements. My wife sewed the edges for me.

Step 3: I taped 2 and a half lengths of velcro ($3 from Dollarama) to the top and bottom edges of the cloth and ironed them on. But by that time, my wife had gone to bed. So I had to sew the width side by hand to form the tube (the sewing machine was too complex for me).
Step 4: I then taped the hook side of the velcro to the inside of the top and bottom tubes and attached the shroud starting from the bottom.
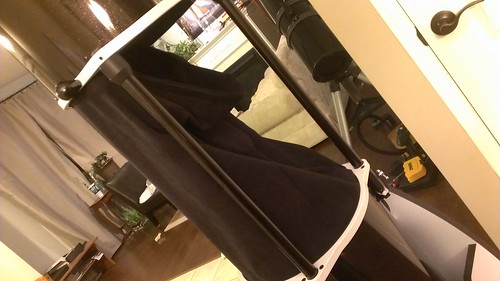
Step 5: With a little tug, I attached the top making sure it was taught all the way around. I looked through the focuser to ensure the shroud was not in the way of the primary.
Voila! A custom-made shroud just the way I like it. Tomorrow, I will be sewing the velcro onto the shroud because it is peeling off.
Hope you enjoyed this DIY.

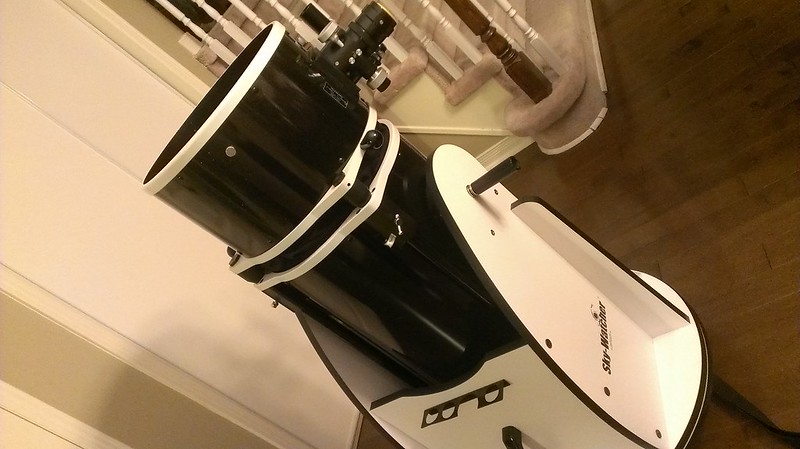

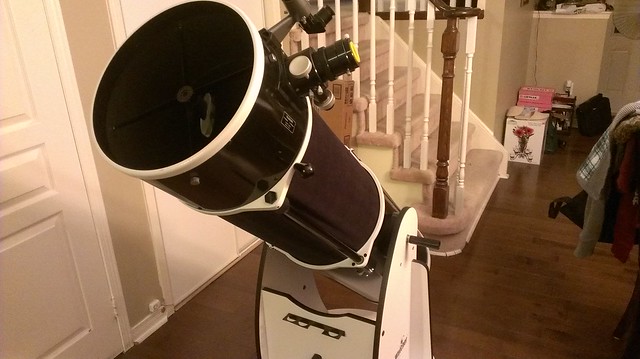
Bought a used 12″ Sky-Watcher Dobsonian Flextube Truss
Well into my first month of my astronomy hobby, and I’m already on my 4th telescope gear: a 12″ Sky-Watcher Dobsonian with collapsible trusses. Standing next to my 8″ newt, it looks like a monster scope.
The Good
I believe I got a pretty good deal with this one because it has several upgrades including:
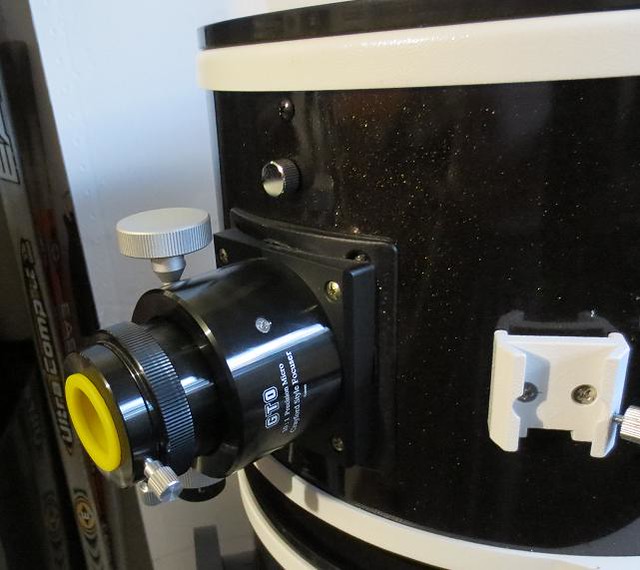
– dual speed focuser
– stiffer primary mirror springs
– smoother azimuth bearings
– swivel caster wheels under the base
and considering these were missing:
– eyepieces
– finder scope
The condition is almost brand new, no scratches on the base, and clean and shiny exterior. The primary and the secondary mirrors have some dust on them: an indication that they have never been touched. Then again, the average astronomer take extra special care of their telescopes. The total cost was “significantly” lower than a brand new one. But it cost me extra gas because had to drive 2 hours one way to pick it up.
First Challenges
Having spoiled by my Discovery 8 EQ in convenience/performance, I have to manage my expectations in order to overcome these challenges:
Heavy: Moving the telescope from my living room to the front door was easy because it had casters. Only when I had to disassemble and reassemble it outside that I realized how heavy and unwieldy this telescope was. I was expecting this before I bought it, but not as much as this.
Decollimated: I had collimated the scope inside, but when I reassembled it outside, it had miscollimated by a quarter of an inch.
Underfocussed: The upgraded dual-speed focuser was too short and extension tube was not included. I reached focus by pulling out the eyepiece by 30mm.
Jerky Tracking: Azimuth motion was very smooth, but altitude was quite jerky and squeeky making tracking and sketching more challenging than my GEM-mounted scope that had a smooth slow motion RA.

First Impressions
First light was just outside my front door where I was subject to intense glare from my neighbours’ lights and street lights. The only way for me to judge the performance would be to take it to the same dark site where I have been taking my 8-incher. I might get a chance to do that this weekend.
In about a month, I will decide which one of my telescopes will have to go.