
In this video, I will introduce new astronomers to the basics of using telescopes on an equatorial mount. How to use an Equatorial Mount for Beginners will explain the difference between an equatorial mount and an altazimuth mount and the advantages of each. How to determine the right ascension and declination motions using slow motion control knobs. Without getting too technical, I will describe the equatorial grid, right ascension, declination and how your equatorial mount follows these imaginary lines. I also walk through a simulation of how it would operate out in the field using Stellarium planetarium software.
Tag Archives: astronomy
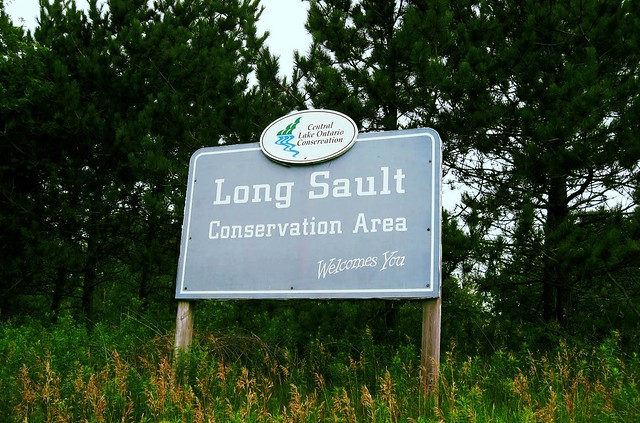
Stargazing at Long Sault Conservation Area
When I first took up this hobby, I had a Meade 90mm refractor and set it up in my backyard. I also set it up in the front yard, and a few times, in an empty field in my neighbourhood. This was all good for observing planets, stars, and the moon. However, I could not find any globular clusters, nebulas, and galaxies aka Deep Sky Objects (DSO’s).
I heard and read that it was either I had too much light pollution or my scope was too weak. I bought a larger scope instead: the Discovery 8 EQ.
Well, after a week, I still could not find any DSO’s so it was time to try it in a dark sky site. I found out that the Royal Astronomical Society of Canada uses the Long Sault Conservation Area once a month for star parties. So I decided to try it out because I have not joined any Astronomy Clubs yet.
From where I live, Long Sault Conservation Area is a 23 minute drive in mostly dark, mostly straight away 80 Km/h highways. It is in the Oak Ridges Moraine region so it is quite elevated. When I first scouted the area, I noticed how it was clean and well maintained. There were a few cars in one of the two parking lots. Visitors walked their dogs, biked, and hiked. There are 2 washrooms in the main parking lot, and a solar powered pay parking machine.
After sunset, and people started to leave, it got very dark and quiet. The trees around the main parking lot can block up to 10 degrees above the horizon, but they shield you from the breeze. There were no stray light sources from anywhere, even from a distance. In my first 2 scouting trips, it was too cloudy and foggy to see the sky. But on my 3rd trip, I was in for a treat: I found the Milky Way Galaxy for the first time in my life with my naked eye.
On August 3rd, 2013, I joined 8 other amateur astronomers from the Royal Astronomical Association of Canada Toronto (RASC Toronto) in Long Sault Conservation Area. I didn’t really know what to expect, and how to behave around other observers. I had a few “firsts”. This was the first time I observed with more than 1 other astronomer, my first star party, and the first time I looked through a 12.5″ telescope (a dobsonian).
It was a cloudless night, seeing was above average, and I did not notice any fog on the way there. People were very friendly. Sometimes, someone would call out an object that they have in the eyepiece and we would come have a look. Besides a couple of people with binoculars, I was the only one with an unguided telescope.
In my rush out the door, I forgot to bring my Nightwatch book. But the organizer (“Stew”) was kind enough to help me locate M15 using his binoculars and his green laser. He also let me borrow his star atlas and offered me a couple of sketching tips using a kneaded eraser.
If you plan on observing at Long Sault Conservation Area, take note of the following:
- Parking is not free. You must pay for parking even at night to help pay for maintenance of the park.
- If your mobile provider uses WCDMA (i.e. Wind Mobile), you will not get a signal unless you roam.
- The nearest gas station is at least 15 minutes away, so make sure you have enough gas for a round trip.
- The area is officially closed and off limits after dark, so do not wander off into the woods.
- The parking lot surface is gravel, so if you drop your eyepieces, it will scratch them.
- For your own safety, bring a buddy and avoid observing alone.
Overall, it’s worth the drive to Long Sault Conservation Area for stargazing. I still observe there because it is convenient, very dark and well maintained. I also heard that the parking lot is ploughed during the winter. For more information, visit http://www.cloca.com/con_areas/CAlongsault.php.
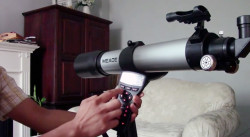
Meade 90mm StarNavigator Refractor DS2090AT-TC
This is my first ever astronomy gear review of my first telescope: the Meade 90mm StarNavigator Refractor (DS2090AT-TC). It has a 90mm aperture objective, 800mm focal length giving it a focal ratio of F/8.8. It is computer-guided which is perfect for beginners.
Overall
I think this is a great telescope for a beginner such as myself. It got me hooked into astronomy that now I want to learn more about it.
Dislikes
The mount could be very flimsy. When you’re adjusting for focus, it takes about 5 to 10 seconds for the vibrations to stop. Sometimes the GOTO capability isn’t quite accurate. The focuser is made of plastic that it might not be able to handle the weight of heavier accessories.
Likes
I like its simple design and build quality. I like how light it is to transport and how the tray does not need to be disassembled to fold the legs. I like the GOTO capability when it works. It allows a beginner like myself to spend more time observing than looking for objects.

Astronomy Observation Session Checklist and Tips
I live in a white/red zone so my skies only show the major stars of the constellations, so I have to drive to a dark sky site whenever I want to observe DSO’s. It seems every time I drive out to a dark sky site for astronomy sketching and observation, I always end up forgetting to bring something. Last night, I forgot to bring my observer’s chair. The night before that, it was my blending stump. So I came up with a checklist for me to go over before each trip.
I only bring 1 telescope at a time so I will only check off items under the ‘Dob’ or ‘Newt’ categories.
| Category | Item | |
| Dob | OTA caps | |
| Dob | Mount | |
| Dob | Altitude Handles | |
| Dob | Focuser adapters/caps | |
| Newt | OTA cap | |
| Newt | Mount | |
| Newt | Suppression pucks | |
| Newt | Focuser cap | |
| Accessories | Eyepieces & caps | |
| Accessories | Flashlights | |
| Accessories | Observer’s chair | |
| Tools | Sky Atlas | |
| Tools | Laser Collimator | |
| Tools | Allen key & screwdriver | |
| Sketching | Clipboard | |
| Sketching | Pencils | |
| Sketching | Blending stump | |
| Sketching | Sketch templates | |
| Sketching | Reading light | |
| Attire | Eyeglasses | |
| Attire | Jacket & Hat | |
| Attire | Gloves | |
| Optional | Laptop | |
| Optional | Binoculars | |
| Optional | Camera | |
| Mandatory | Coffee |
At the end of the observing session, I use the checklist again to make sure I did not forget anything. If I am alone at the site, I also drive over and light up the spot to check for any garbage I might have left behind.
Common Sense Tips
They may not applicable to you, but these obvious ones are my pre-requisites:
- Make sure the weather forecast is favourable.
- Ensure my car has enough gas for a round trip.
- Fully charge my mobile phone’s battery.
- Tell someone where I’m going and when I will be back.
Are you an amateur astronomer who has to drive to a dark site to observe like me? Care to tell us what you have on your checklist, if you have one?
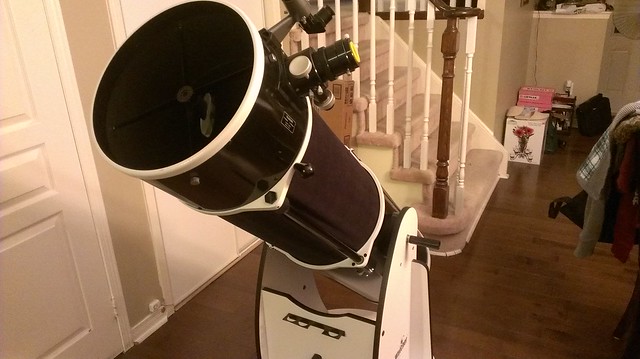
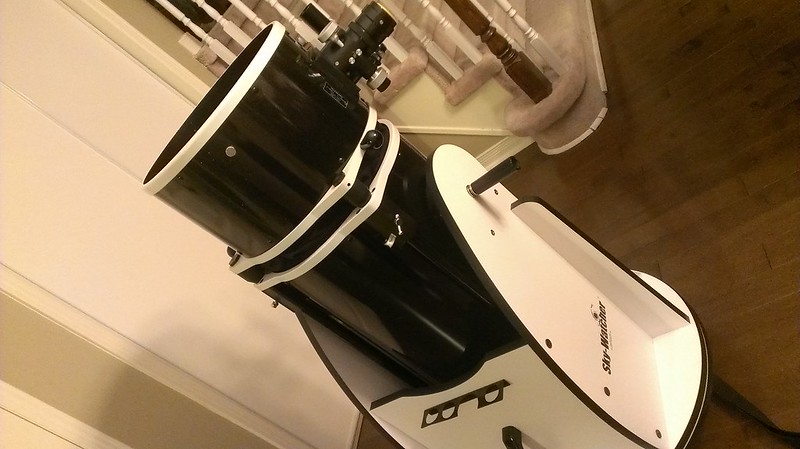
First Light with 12″ Sky-Watcher Flextube

I took my 12″ Sky-Watcher Flextube to the Durham Region Astronomical Association’s dark site last night for the first time and found that the location was a few minutes further and more difficult to get to than Long Sault Conservation.
Moon: With a 75% full moon, it lit up the haze so much that I could not even resolve M31. So I put my shades on and observed the moon instead. The details of the moon’s surface at the terminator was spectacular. With a barlowed 7mm (428x), the image was wavering quite a bit, but so incredible. I could resolve the craters and the shadows they cast. It was like hovering over the moon in a spaceship.
Jupiter: I packed up and went to friend’s house to watch a boxing match. By the time it was over, it was already 2 AM and I could see Jupiter already. So I setup my telescope right at my front steps to observe it. At 214x, I could resolve the 2 dark stripes and at least 4 moons but again, it was wavering and not focused. At 428x, it was even worse. I was a little disappointed because the view was only marginally better than my Discovery 8 EQ.
M42 Orion Nebula: By 3 AM, I noticed Orion’s belt was higher and was above a line of haze. Still struggling with my right-angle viewfinder orientation, I pointed it in the general direction of M42 and started panning the area at 62x. It took 30 minutes and I was about ready to give up, until I noticed a glare from the corner of the FOV. I followed the glare as it got more intense, and then it emerged: The Orion Nebula.
I couldn’t believe it that even with all that haze, it was resolving with very good contrast. I noticed at least 2 round voids occupied by stars in the white dust that radiated away from the centre in 180 degree direction. I was so happy that I even woke up my wife to show it to her. Her reaction after seeing it was interesting to me: “you mean that cloud?”

Concerns: Significantly heavier and more awkward to transport than the Discovery 8 EQ. Altitude adjustment was sticky and tube is bottom-heavy it wants to slew up quite often by itself. No significant proof of improvement over the Discovery 8 EQ thus far.
At 4 AM I packed it in. What a great ending for a mostly disappointing night.
DIY Custom Shroud for 12″ Sky-Watcher Flextube
Rainy days and cloudy nights make me so restless. Tonight was another one of those nights. All day, I had been thinking about custom cutting a foam sleeping mat as a shroud for my Sky-Watcher 12″ Dobsonian Flextube. But on the way home, I came up with something a little more complicated and time-consuming. A custom-made cloth shroud.

Step 1: I measured the inside diameter of the top and bottom tubes and the distance between them. I came up with 42.5″ diameter x 23″ height. I went to the local Fabricland and bought a thick black cloth from the clearance section ($7).

Step 2: I measured again and noticed that I had to reduce the inside diameter by half an inch to account for the thickness of the cloth. The maximum thickness allowance is 0.5″, otherwise, the material will reduce the aperture. I folded and ironed the new measurements. My wife sewed the edges for me.

Step 3: I taped 2 and a half lengths of velcro ($3 from Dollarama) to the top and bottom edges of the cloth and ironed them on. But by that time, my wife had gone to bed. So I had to sew the width side by hand to form the tube (the sewing machine was too complex for me).
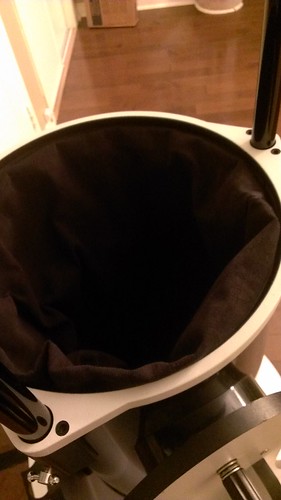
Step 4: I then taped the hook side of the velcro to the inside of the top and bottom tubes and attached the shroud starting from the bottom.
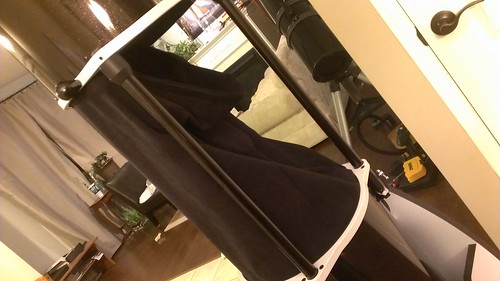
Step 5: With a little tug, I attached the top making sure it was taught all the way around. I looked through the focuser to ensure the shroud was not in the way of the primary.
Voila! A custom-made shroud just the way I like it. Tomorrow, I will be sewing the velcro onto the shroud because it is peeling off.
Hope you enjoyed this DIY.

Double Cluster in Perseus and NGC 663
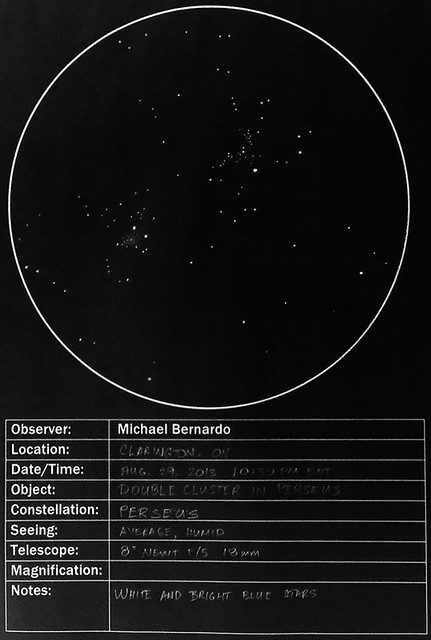
Tonight was humid but the last cloudless night before several days of cloudiness. So I headed back to Long Sault Conservation Area for a dark sky. I brought the Nightwatch book to reference the objects I wanted to observe tonight in Perseus and Cassiopeia.
It was already pitch black when I got there and was glad to see another stargazer lying down on the grass with his binoculars. His company set me at ease and allowed me to hunt and sketch NGC 663 in a more relaxed manner. Not realizing one of the collimation screws was already backed out all the way, it came lose. It took me 10 minutes to put it back.

I was half way through sketching the double cluster when he approached me for some small talk and to say goodbye. After he left, I was once again alone and uneasy so I rushed through the double cluster leaving out a lot of the details. I had been observing for 2 hours and didn’t realize that my OTA and primary was literally dripping in condensation so I packed up.
Once again, it was a very productive night for me. I am no longer questioning my telescope’s optics. It was just a matter of finding a dark sky.
I finally found M13 and the Milky Way
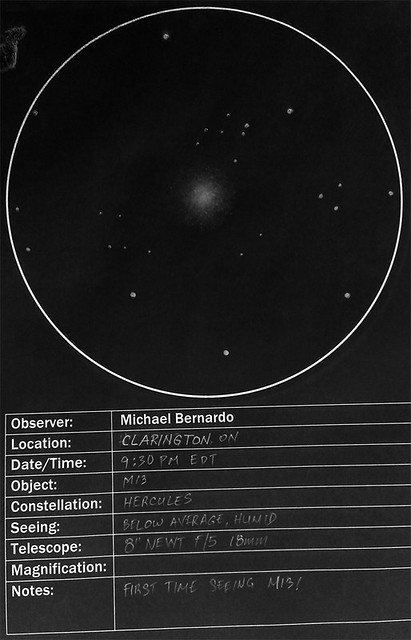
Tonight, I set out to go to a dark site alone at the Long Sault Conservation Area in Clarington, Ontario. I was there scouting the area last night. I brought my gear with me, but it was too cloudy last night. Tonight, was humid with patches of fog, and below average seeing, but the center of the sky was clear enough.
I left 30 minutes after sunset and the site was 20 minutes away, so by the time I was setting up my equipment, it was almost pitch black.
Milky Way Galaxy: I looked up at the sky and found that there was haze near the horizon. And then, what I thought was a strip of haze across the middle of the sky… was actually the Milky Way. Wow! This was the first time I have laid eyes on it! It was spectacular! There were so many stars, I was disoriented at first and didn’t know where the constellations were.
This was my chance to see if I needed to upgrade my telescope! So I aimed my Telrad at the spot where I knew M13 was supposed to be, looked into my eyepiece and… BAM! There it was! I couldn’t believe it! It was a dark circular patch of dim stars!
M13: Out goes my sketching kit and I started sketching away. As the sketching session wore on, my observation skills improved. I started using averted vision and I noticed more fainter stars that ended up in my sketch. I have attached my first sketch of M13.
M31: After that, I aimed at M31 and BAM! There it was: the Andromeda Galaxy and off to the left is what looks like a smaller faint object. But my goal tonight was to sketch M13 only so I just observed it.
So in the end, I really did “upgrade” my telescope just by driving 20 minutes away. This is my most successful outing so far and it wasn’t even a good seeing night. I am really enjoying hunting and sketching. Clear skies!
DIY Astronomical Red LED Flashlight

It’s not like this hasn’t been done before, but I needed a red flashlight in a hurry so I put one together using a flashlight from the Dollar Store and red plastic folder kicking around. It takes at least 20 minutes for our eyes to dark adapt, and only a few seconds to lose it by shining a bright light into the pupil. Red light has the least effect on our dark adaptation so that we can observe faint objects and sketch them.
Materials:
1. Flashlight. I bought one from the Dollar Store.
2. Red semi translucent acrylic folder or tote.
3. Scissors.
4. Pencil.
Instructions:
1. Use the head of the flashlight to trace a circle on the acrylic folder. The circle will be larger than the interior of the tube so make sure you trace the line as close as possible.

2. Cut out the circle making sure it is slightly bigger than the flashlight opening. The slight difference will make it push against the interior of the flashlight as well as provide maximum coverage of the white LED’s.
3. Insert plastic cutout into flashlight head. Because the cutout is slightly bigger, the edges will push against the opening to keep itself in place. If the piece is too big, cut away small pieces of it until it is just snug.

4. Turn on flashlight to test for light leaks. Redo if necessary.
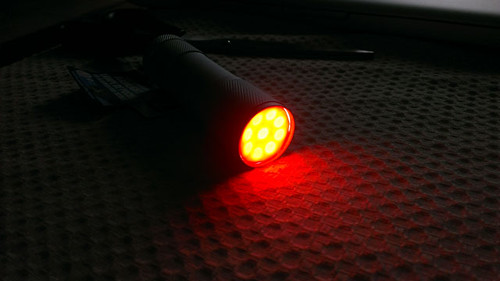
If the light appears too dim, try it out in a dark room first, like a closet or bathroom. It might just be the perfect brightness. You don’t want it too bright.
Try this out. If you have ways to improve this Do It Yourself project, please share your comments below.
My First Astronomy Sketch: Jupiter and its moons

Last night, I only had a window of less than 2 hours to look for M13 but I still did not find it. Haze had started to form near the horizon and my next door neighbour decided to keep their porch lights on tonight creating a glow in my view. I gave up after 2 hours and set up my alarm to wake me up at 4:30 AM so that I can check out Jupiter and Mars.
Fast forward to 4:30 AM:
My first view of the gas giant through light haze made my jaw drop. Here I am looking at what Galileo first saw 400 years ago. I took the opportunity to line-up my telrad as well. At first, it was just a white disk waving like a flag with 2 moons to the right. After fine-tuning my focuser I noticed 2 faint lines above the equator. After 5 minutes, I noticed a fainter third line near the top pole, and another moon appeared closer to the planet but in a more southern orbital plane. There also appears to be a 4th moon but it seems too far to the left that it might be a star.
I tried to take a picture of it using my phone to no avail. So I quickly looked for a piece of paper and a pen and made a rough sketch of it (attached). This was a lot of fun and self-gratifying!
While I was there, I also looked at Mars, but it was just an unremarkable faint brown dot. The Orion nebula was just to the right so I scanned it but the moon was just too bright and the haze was too much.
Overall, this morning’s experience was an unforgettable one, and I have a sketch I will remember it by.