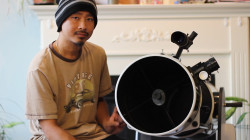
In this video, I demonstrate how I collimate my newtonian telescope without a cheshire (if you don’t have one). There are 3 basic steps to collimating: 1) Center the secondary under the focuser; 2) Align the secondary to the primary; 3) Align the primary back to the secondary. In step one, I will use a camera phone instead of a cheshire to center the secondary under the focuser tube. Click on the video below to play.
Monthly Archives: October 2013
How I Learned to Use a Right Angle Corrected Image (RACI) Finder Scope

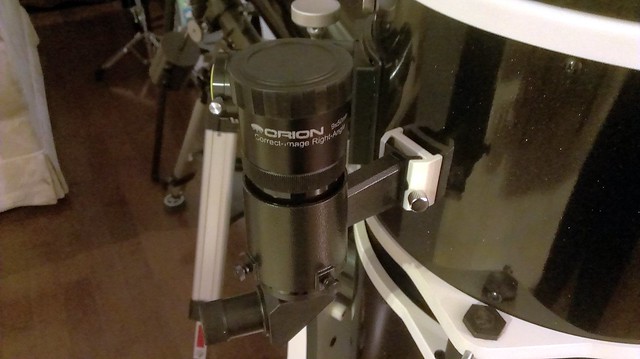
Many telescopes come with a straight-through finder scope or a right-angle finder scope. My Discovery 8 EQ came with the later which was very difficult to use because it was unintuitive. My 12″ Sky-Watcher has a Right Angle Corrected Image (RACI for short) finder scope. The advantage of using a RACI over a straight through finder scope or a regular right angle finder scope are:
- The 90 degree eyepiece allows you to use the finder scope more comfortably;
- The Amici prism corrects the image caused by the 90 degree redirection so that the image is right side up.
This eliminates 2 problems: 1) straight through finders can become uncomfortable to use especially when objects are near zenith, and; 2) objects in the finder scope move in unintuitive directions.
However, for newcomers to Astronomy like myself, locating objects through the RACI finder scope still proved to be challenging because of one thing: the view is awash with stars I have never seen before, especially in light polluted skies. I found myself in this situation not too long ago, and in many cases, I still do. The solution was simple, but difficult to master. At least in the beginning.
Rough Aligning
To rough align the finder, I stand behind the telescope until my head is aligned with it so that the optical tube appears vertical. Then I point it to one of the major stars of the constellation in question. This took some practice, but after a few sessions, I can now rough align without standing behind the telescope.
Using Binoculars
My finder scope has a 9x zoom magnification. I also happened to have a pair of binoculars which has an 8x zoom magnification. If I were to locate M13 in the constellation of Hercules, with the naked eye, I can only see 4 major stars. Through the binoculars, I can see more major stars and dozens of minor stars.
The view through my binoculars will be very similar to my finder scope. At first, it’s hard to tell which portion of the constellation I am looking at. So I spend a few minutes studying the constellation comparing views in the binoculars, finder scope, and a sky atlas.
I look for patterns and shapes that I can use to star hop. For examples, I try to imagine shapes, like triangles, squares, or curved lines on the atlas, and then I try to look for those in the field of view.
I keep doing this for every new constellation I am studying. I try to learn the names of the major stars if I want. After a while, my brain and my eyes develop a stronger connection with my orientation in the constellation in question.
In the case of M13, it took me a week to find it the first time. But after about 3 successful attempts, I can easily resolve it through the finder scope as a faint star within a few seconds. This is because my brain and eyes know where to look and what to expect to see.
Using a Keyring
After a few times practicing, you will have an idea of the size of your finder scope as it is superimposed in the sky. But in the beginning, you probably won’t. A good technique is to use a keyring, a rubber band, or something round that you can change its shape.
Look through your finder scope and identify the major stars you see. Then place a keyring on your sky atlas to estimate your field of view. Move the finder scope one degree, or until you see the next major star. Then on your atlas, move the keyring in the same direction.
Keep using these techniques until you become familiar with the constellations. Eventually, you will become so used to it, you won’t need the keyring, or maybe even a star atlas on your favourite constellations.
Do you have any tips for using a RACI? Let us know in the comments section below.
Stargazing at Long Sault Conservation Area

When I first took up this hobby, I had a Meade 90mm refractor and set it up in my backyard. I also set it up in the front yard, and a few times, in an empty field in my neighbourhood. This was all good for observing planets, stars, and the moon. However, I could not find any globular clusters, nebulas, and galaxies aka Deep Sky Objects (DSO’s).
I heard and read that it was either I had too much light pollution or my scope was too weak. I bought a larger scope instead: the Discovery 8 EQ.
Well, after a week, I still could not find any DSO’s so it was time to try it in a dark sky site. I found out that the Royal Astronomical Society of Canada uses the Long Sault Conservation Area once a month for star parties. So I decided to try it out because I have not joined any Astronomy Clubs yet.
From where I live, Long Sault Conservation Area is a 23 minute drive in mostly dark, mostly straight away 80 Km/h highways. It is in the Oak Ridges Moraine region so it is quite elevated. When I first scouted the area, I noticed how it was clean and well maintained. There were a few cars in one of the two parking lots. Visitors walked their dogs, biked, and hiked. There are 2 washrooms in the main parking lot, and a solar powered pay parking machine.
After sunset, and people started to leave, it got very dark and quiet. The trees around the main parking lot can block up to 10 degrees above the horizon, but they shield you from the breeze. There were no stray light sources from anywhere, even from a distance. In my first 2 scouting trips, it was too cloudy and foggy to see the sky. But on my 3rd trip, I was in for a treat: I found the Milky Way Galaxy for the first time in my life with my naked eye.
On August 3rd, 2013, I joined 8 other amateur astronomers from the Royal Astronomical Association of Canada Toronto (RASC Toronto) in Long Sault Conservation Area. I didn’t really know what to expect, and how to behave around other observers. I had a few “firsts”. This was the first time I observed with more than 1 other astronomer, my first star party, and the first time I looked through a 12.5″ telescope (a dobsonian).
It was a cloudless night, seeing was above average, and I did not notice any fog on the way there. People were very friendly. Sometimes, someone would call out an object that they have in the eyepiece and we would come have a look. Besides a couple of people with binoculars, I was the only one with an unguided telescope.
In my rush out the door, I forgot to bring my Nightwatch book. But the organizer (“Stew”) was kind enough to help me locate M15 using his binoculars and his green laser. He also let me borrow his star atlas and offered me a couple of sketching tips using a kneaded eraser.
If you plan on observing at Long Sault Conservation Area, take note of the following:
- Parking is not free. You must pay for parking even at night to help pay for maintenance of the park.
- If your mobile provider uses WCDMA (i.e. Wind Mobile), you will not get a signal unless you roam.
- The nearest gas station is at least 15 minutes away, so make sure you have enough gas for a round trip.
- The area is officially closed and off limits after dark, so do not wander off into the woods.
- The parking lot surface is gravel, so if you drop your eyepieces, it will scratch them.
- For your own safety, bring a buddy and avoid observing alone.
Overall, it’s worth the drive to Long Sault Conservation Area for stargazing. I still observe there because it is convenient, very dark and well maintained. I also heard that the parking lot is ploughed during the winter. For more information, visit http://www.cloca.com/con_areas/CAlongsault.php.
Meade 90mm StarNavigator Refractor DS2090AT-TC
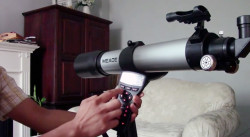
This is my first ever astronomy gear review of my first telescope: the Meade 90mm StarNavigator Refractor (DS2090AT-TC). It has a 90mm aperture objective, 800mm focal length giving it a focal ratio of F/8.8. It is computer-guided which is perfect for beginners.
Overall
I think this is a great telescope for a beginner such as myself. It got me hooked into astronomy that now I want to learn more about it.
Dislikes
The mount could be very flimsy. When you’re adjusting for focus, it takes about 5 to 10 seconds for the vibrations to stop. Sometimes the GOTO capability isn’t quite accurate. The focuser is made of plastic that it might not be able to handle the weight of heavier accessories.
Likes
I like its simple design and build quality. I like how light it is to transport and how the tray does not need to be disassembled to fold the legs. I like the GOTO capability when it works. It allows a beginner like myself to spend more time observing than looking for objects.


