Category Archives: Featured

Featured article.

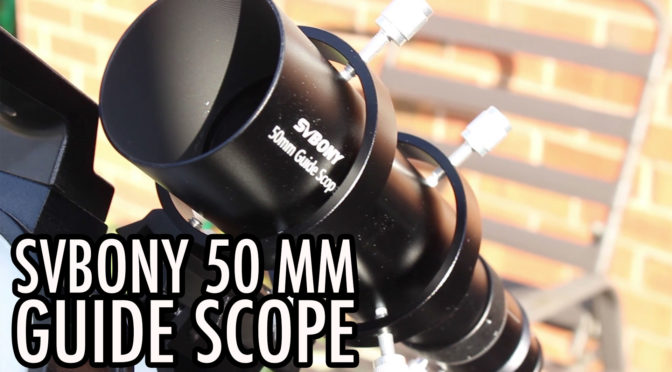
SVBony SV106 50 mm Guide Scope Unboxing Installing First Impressions

Can you use a guide scope as a finder scope? I did. Here are my first impressions of the SVBONY 50 mm guide scope.

While this seems to be a generic guide scope that has sold under different brand names, it doesn’t appear to be cheaply made. This appears to be a good quality product with excellent fit and finish. The rough focussing tube is long enough to reach focus without the need of an extension. The helical focuser was very smooth with no rough grinding feel. When rotating the focuser, it does not rotate whatever is attached at the focuser end. So if you have a camera attached, it will remain in the same orientation instead of twisting any cables that might be attached to it.

When I aligned it during the day, I found the images came through very clearly. The 6 thumb screws took some getting used to for alignment but I was able to align it with precision. I also appreciate how it has nylon tips to prevent scratching the scopes’ nice finish. Finally, the price of this guide scope is so reasonable that I think it offers excellent value for your money.

A few things worth noting are that the trade off for not needing an extension tube to reach focus is that you cannot use a diagonal as an attachment. Also, this did not come with any manual so you would have to figure it out for yourself on how to assemble and install it. I hope this video helped a little bit in that regard. And lastly, the images through the eyepiece appear upside down, but I already expected that. Overall, I think this is a great addition to my astronomy gear.

  1. SVBony SV106 Guide Scope: https://amzn.to/303lUey
  2. SVBony Dovetail Base: https://amzn.to/3oEjrkP

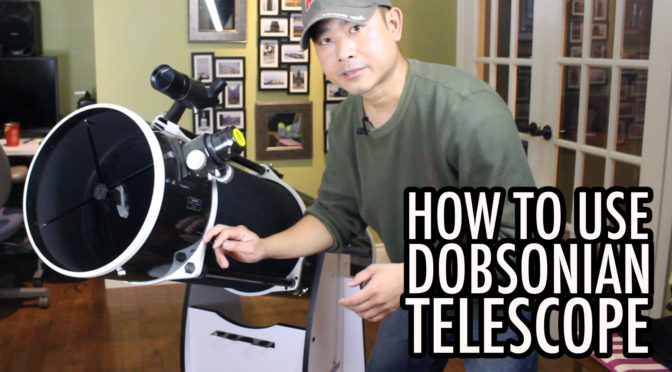
How to Use a Dobsonian Reflector Telescope

This video is aimed at new astronomers who need some help on getting started or returning astronomers who may have forgotten how to use a dobsonian telescope. So if you are of the latter, this is going to be a good refresher.

  1. Inspect & Assemble Telescope
  2. Collimate Telescope
  3. Align Finder Scope
  4. Observe Through Finder Scope
  5. Observe Through Eyepiece

If you are just starting out, I highly advise that you first practice observing larger and brighter objects like the moon because it will be easier to locate.

Don’t Overlook Binoculars: 5 Advantages Over Telescopes

Obviously, they have their shortcomings in terms of aperture and magnification, but binoculars are often overlooked by new astronomers because when they think about astronomy, they automatically think about telescopes.

In this video, I will show you 5 advantages that binoculars have over telescopes:

  1. They are small and lightweight.
  2. They are easy to transport.
  3. You might already have one.
  4. They are less expensive.
  5. They make it easier to find objects.

While they also have their obvious disadvantages, like smaller aperture, binoculars have a special place in astronomy. Enjoy the video.

Click here to watch it in a new window.

How to Sketch Stars for New Astronomers


Similar to regular sketching, astrosketching is a relaxing and rewarding activity where the subject is the beauty of the night sky.
In this video, i’ll cover the basics of amateur astronomy sketching including:
– Why Astronomy Sketching is Fun
– What tools you need
– Sketching techniques
– Logging your observation
– Digitizing your sketches
– and some common Challenges
I used M45 as my subject which is perfect for beginners like me. You are drawing a portrait of the universe. Take your time and enjoy it.

How to use an Equatorial Mount for Beginners

In this video, I will introduce new astronomers to the basics of using telescopes on an equatorial mount. How to use an Equatorial Mount for Beginners will explain the difference between an equatorial mount and an altazimuth mount and the advantages of each. How to determine the right ascension and declination motions using slow motion control knobs. Without getting too technical, I will describe the equatorial grid, right ascension, declination and how your equatorial mount follows these imaginary lines. I also walk through a simulation of how it would operate out in the field using Stellarium planetarium software.

Collimate a Telescope without a Cheshire

In this video, I demonstrate how I collimate my newtonian telescope without a cheshire (if you don’t have one). There are 3 basic steps to collimating: 1) Center the secondary under the focuser; 2) Align the secondary to the primary; 3) Align the primary back to the secondary. In step one, I will use a camera phone instead of a cheshire to center the secondary under the focuser tube. Click on the video below to play.

Meade 90mm StarNavigator Refractor DS2090AT-TC

This is my first ever astronomy gear review of my first telescope: the Meade 90mm StarNavigator Refractor (DS2090AT-TC). It has a 90mm aperture objective, 800mm focal length giving it a focal ratio of F/8.8. It is computer-guided which is perfect for beginners.

Overall

I think this is a great telescope for a beginner such as myself. It got me hooked into astronomy that now I want to learn more about it.

Dislikes

The mount could be very flimsy. When you’re adjusting for focus, it takes about 5 to 10 seconds for the vibrations to stop. Sometimes the GOTO capability isn’t quite accurate. The focuser is made of plastic that it might not be able to handle the weight of heavier accessories.

Likes

I like its simple design and build quality. I like how light it is to transport and how the tray does not need to be disassembled to fold the legs. I like the GOTO capability when it works. It allows a beginner like myself to spend more time observing than looking for objects.

Astronomy Observation Session Checklist and Tips

I live in a white/red zone so my skies only show the major stars of the constellations, so I have to drive to a dark sky site whenever I want to observe DSO’s. It seems every time I drive out to a dark sky site for astronomy sketching and observation, I always end up forgetting to bring something. Last night, I forgot to bring my observer’s chair. The night before that, it was my blending stump. So I came up with a checklist for me to go over before each trip.

I only bring 1 telescope at a time so I will only check off items under the ‘Dob’ or ‘Newt’ categories.

Category Item
Dob OTA caps
Dob Mount
Dob Altitude Handles
Dob Focuser adapters/caps
Newt OTA cap
Newt Mount
Newt Suppression pucks
Newt Focuser cap
Accessories Eyepieces & caps
Accessories Flashlights
Accessories Observer’s chair
Tools Sky Atlas
Tools Laser Collimator
Tools Allen key & screwdriver
Sketching Clipboard
Sketching Pencils
Sketching Blending stump
Sketching Sketch templates
Sketching Reading light
Attire Eyeglasses
Attire Jacket & Hat
Attire Gloves
Optional Laptop
Optional Binoculars
Optional Camera
Mandatory Coffee

At the end of the observing session, I use the checklist again to make sure I did not forget anything. If I am alone at the site, I also drive over and light up the spot to  check for any garbage I might have left behind.

Common Sense Tips

They may not applicable to you, but these obvious ones are my pre-requisites:

  1. Make sure the weather forecast is favourable.
  2. Ensure my car has enough gas for a round trip.
  3. Fully charge my mobile phone’s battery.
  4. Tell someone where I’m going and when I will be back.

Are you an amateur astronomer who has to drive to a dark site to observe like me? Care to tell us what you have on your checklist, if you have one?

Durham Region Light Pollution and where to find a Dark Sky Site

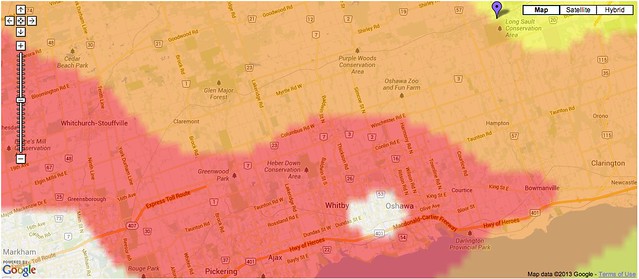
Light pollution map of Durham Region.

When I first started observing with my telescopes, I had an idea what light pollution meant, but did not realize its impact on visual observation especially on Deep Sky Objects (DSO’s). I thought I could observe anywhere I wanted  as long as it was a cloudless sky. I live in the Durham Region after all. Not so fast.

I spent an entire week hunting for the M13 and the Andromeda Galaxy to no avail. Why? Because my sky was brighter than these faint objects. I eliminated most of the local light pollution from my backyard by turning my kitchen lights off, my cell phone, light shields for my telescopes, and used a blanket over my head to block out my neighbour’s lights. After 15 mins of dark adaptation, I still see nothing of these objects.

It turns out that there is a ‘light dome’ high above my sky. The light pollution map above represents the intensity of this light dome super imposed over a map of Durham Region and eastern Greater Toronto Area (GTA). In the order of brightness level:

  • White – Entire sky is grayish or brighter.
  • Red – Milkyway at best very faint at zenith.
  • Orange – Milkyway washed out at zenith and invisible at horizon.
  • Green – Some dark lanes in milkyway but no bulge into Ophiuchus.
  • Yellow – Zodiacal light seen on best nights.
  • Blue – Low light domes on horizon.
  • Grey – Faint shadows cast by milkyway visible on white objects.
  • Black – Gegenschein visible. Zodiacal light annoyingly bright.

I live a suburb of Oshawa in a red zone and within a few minutes of a white zone in the core of the city. By driving to an orange zone 20 minutes away, I was able to see some of the Milky Way’s ‘spilled milk’ look across the sky whereas it was not at all visible from my backyard. I finally found M13 and it didn’t take long for it to ‘pop’ out of my eyepiece. If you want to know the light pollution map in your area, check out Dark Sky Finder by Jonathan Tomshine: http://www.jshine.net/astronomy/dark_sky/ and you will find some dark sky sites around the GTA area within an hour’s drive.

In the Durham Region, I do most of my DSO observations from Long Sault Conservation Area which is just outside the grasp of the red zone. Sometimes I use my local club’s DRAACO observatory which is well within the orange zone. It is well worth the drive for a great night of visual observation and sketching.